Watermelon, Cucumber, Feta Salad with Toasted Sunflower Seeds & Basil

Processed with VSCO with s3 preset

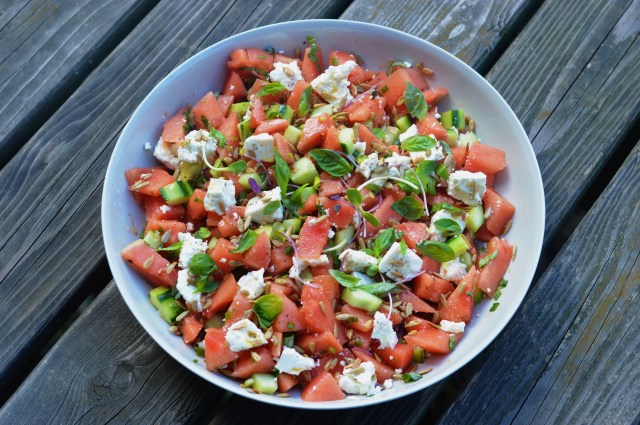
The summer season started super early in Switzerland this year and it has been unusually warm for the last 6 weeks. Hey, I am not complaining at all. And it’s perfect timing because this is the first year we have decided to stay in CH for the whole summer to enjoy this beautiful Swiss Summer. With the warm weather, we have also been entertaining visitors non-stop and the BBQ/picnic invitations just keep on coming. This Watermelon, Cucumber, Feta Salad with Toasted Sunflower Seeds & Basil has become one of my favorite summer dishes and was served up by my sister-in-law on a beautiful evening in Basel. I have made it at least 4 times in the last two weeks because it’s just so good, light and refreshing. And I tell you, the TOASTED SUNFLOWER SEEDS is a game changer to this classic combination of watermelon and feta. There are many more hot summer days and BBQs to come and hoping this salad will make it your table.

image1 (14).JPGimage1 (15).JPGProcessed with VSCO with s2 presetimage1 (17).JPGimage1 (21).JPGProcessed with VSCO with s3 presetProcessed with VSCO with s3 preset

INGREDIENTS: (serves 6-8)

Toasted Sunflower Seeds:

1 tsp extra virgin olive oil (5 ml)

1/3 cup sunflower seeds (40 g)

1 sprinkle of salt

1 sprinkle of sugar

Dressing/Vinaigrette:

1 tbsp dijon mustard (15 ml)

4 tbsp white balsamic vinegar (60 ml)

5 tbsp extra virgin olive oil (75 ml)

2 sprinkles of fleur de sel (Maldon sea salt or kosher coarse salt)

freshly cracked pepper to taste

Salad:

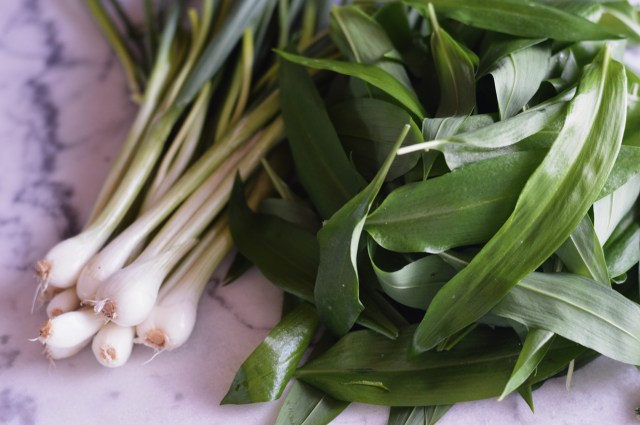
2 large green onions or 4 small spring onions, finely chopped

1 English cucumber, peeled, seeded, halved lengthwise and sliced

1 mini seedless watermelon (approx. 2.3 lbs or 1.8 kg), rind removed and chopped into bite size pieces

7 oz. block of good quality Feta cheese (200 g), crumbled by hand

handful of fresh basil leaves, julienned

handful of micro greens (optional)

INSTRUCTIONS:

  1. In a medium-sized pan, heat 1 tsp olive oil on medium-high heat and add in the sunflower seeds. Sprinkle with salt and sugar and allow the seeds to toast until golden brown. Set aside to cool.
  2. In a large bowl or serving dish, whisk together the dijon mustard, white balsamic vinegar, salt, and pepper. Slowly pour in the olive oil, whisking constantly, to form an emulsion.
  3. To your dressing, add in your thinly chopped green onions, sliced cucumbers, chopped watermelon pieces, and basil. Combine the ingredients with the dressing and allow to marinate for a few minutes.
  4. Before ready to serve, toss in the toasted sunflower seeds, crumbled feta cheese and micro greens. Add a last drizzle of white balsamic vinegar, a drizzle of extra virgin olive oil and 1 pinch of fleur de sel. Toss your salad one last time and serve.

NOTES:

  • I know this goes with out saying, but a good quality feta makes all the difference and I prefer it to buy it as a block and crumble it myself.

Summer Green Bean Salad with Summer Savory Herb & Sun-Dried Tomatoes

image1 (12).JPG

The first time I ever heard of the herb, Summer Savory or as they call it in German, Bohnenkraut, was when I moved to Switzerland. And it was only when I was introduced to this herb, green beans became exciting for me. Summer Savory and Green Beans are a match made in heaven and which is why they probably call it Bohnenkraut in German, which translates to Bean Herb (see more details on this herb in the notes part of the recipe).

With green beans in season, my mother-in-law’s Green Bean Salad with Summer Savory Herb & Sun-Dried Tomatoes is one of my summer staples and is a perfect side for a BBQ or a wonderful starter to a summer meal. To fancy it up, pair this salad with grilled piece of tuna. I assure you with this recipe, green beans will never be boring again.

Processed with VSCO with s2 presetProcessed with VSCO with s2 presetProcessed with VSCO with s2 presetProcessed with VSCO with s2 presetProcessed with VSCO with s2 presetimage2 (4).JPGProcessed with VSCO with s2 presetProcessed with VSCO with s2 presetProcessed with VSCO with s2 presetProcessed with VSCO with s2 preset

INGREDIENTS: (serves 4)

1 lb. fresh green beans washed and trimmed (500 g)

1 tsp salt (5 g)

1 medium yellow onion finely chopped

1 garlic clove finely chopped

1/2 tbsp Dijon mustard (10 g)

4 tbsp apple cider vinegar (60 ml)

5 tbsp good quality extra virgin olive oil (75 ml)

2 tsp dried summer savory herb (10 g)

2-3 generous pinches of Maldon sea salt or fleur de sel

freshly cracked pepper to taste

4 sundried tomatoes thinly sliced

INSTRUCTIONS:

  1. Wash and trim the green beans.
  2. In a medium saucepan, add enough water to cover half of the beans and 1 tsp salt  and steam for 15-20 minutes until the beans are fully cooked but still have a bite. Once cooked, strain the water from the beans and set aside.
  3. While your beans are steaming, finely chop 1 medium-sized onion and 1 garlic clove.
  4. In a salad bowl, add your chopped onion, garlic, mustard, apple cider vinegar, olive oil, summer savory herb, Maldon sea salt, freshly cracked pepper and whisk the ingredients together until the dressing has emulsified.
  5. Add the warm green beans to your dressing and mix well.
  6. Allow the green beans to marinate in the dressing for at least 1 hour (at room temperature) or up to 24 hours in the refrigerator. The longer the better.
  7. Thinly slice the sun-dried tomatoes and mix them into the green beans before serving and add another pinch of Maldon sea salt and another dash of freshly cracked pepper if necessary as the green beans tend to absorb the dressing.

NOTES:

  1. This salad is best to serve at room temperature.
  2. You can purchase the herb, summer savory or Bohnenkraut as a dried herb. Sometimes you can find it fresh in the summer time, but the dried form is more intense in taste and I prefer it since I always have it in my pantry.

Orange Fennel Rosemary Salad

image1-133

I have been eating this salad on repeat for the last 4 weeks. With the beautiful oranges in season, this has become my “go-to“ salad this winter. It’s super easy, wonderfully delicious and very healthy (also Paleo and Whole 30 compliant). This is also a great salad you can prepare in advance for a dinner party because it just gets better with time and allows all of the flavors to marinate together. I thank my husband again for this wonderful Sicilian recipe.

image1-130image5image4-8image1-131image3-78image4-9image2-101image1-134.JPGimage3-79img_4915

INGREDIENTS: (serves 4)

4 large oranges (you can use any combination of sweet oranges; here I used 2 blood oranges & 2 navel oranges)

1 large fennel bulb (or 2 smaller ones)

1 fresh rosemary sprig

small handful of capers

coarse sea salt

generous drizzle or two of high quality extra virgin olive oil

freshly cracked pepper


INSTRUCTIONS:

  1. Trim the fennel bulb and cut in half. Thinly slice each half.
  2. Using a sharp knife, slice off both ends of each orange. Following the curve of the fruit, cut away the peel and white pith (keep the peels for their juice). Then thinly slice crosswise.
  3. In your serving dish, pour any juice that has accumulated on your work surface, including all of the juice that you can squeeze out of the cut peels.
  4. Line a layer of orange rings on the bottom of your dish and then layer with some fennel slices. Continue to layer with remaining orange rings and fennel.
  5. Pick the rosemary needles off the sprig and chop very finely and add to the salad.
  6. Add a small handful of capers.
  7. Season the salad to taste with a couple of pinches of coarse sea salt (very important there is enough salt), a generous drizzle or two of high quality extra virgin olive oil and freshly cracked pepper.
  8. Toss the salad and let it sit for at least 15-20 minutes before serving. Add another drizzle of olive oil and a pinch of sea salt if necessary right before serving.


Carrot Ginger Coconut Soup

image1-129.JPG

Last year, we  enjoyed a delicious dinner at the Wetterhorn Hotel in Hasliberg, which I highly recommend and they served this amazing carrot coconut soup.  Ever since, my best friend and I constantly reminisce of this soup because it was outstanding.

As snow has fallen over the Alps and the winter season has begun in Switzerland, I thought what a better time to recreate this delicious soup. This carrot ginger coconut soup is exactly what I need with the arrival of cold weather and the gloom that can come with a Swiss winter.

image2-98.JPGProcessed with VSCO with s2 presetProcessed with VSCO with s3 presetProcessed with VSCO with s3 presetProcessed with VSCO with s3 presetProcessed with VSCO with s3 preset

INGREDIENTS: (serves 4-6)

3 lbs carrots, peeled and chopped (1.5 kg)

1 large yellow onion chopped

2 tbsp extra virgin olive oil (20 g)

1 inch piece of fresh ginger, sliced (20 g)

4 whole kaffir lime leaves

2 lemongrass stalks

1 tbsp vegetable bouillon (25 g)

1.5 L hot water

1 cup coconut milk (250 ml)

1/2 fresh lime, juiced

Garnish (optional):

Fresh cilantro, chopped

Fresh chili, sliced

Hot chili flakes

INSTRUCTIONS:

  1. Peel and roughly chop carrots and 1 large yellow onion.
  2. Heat 2 tbsp of extra virgin olive oil on high in a large pot and saute the chopped onion. Turn the heat down to medium-high and continue to saute the onions for 2-3 minutes.
  3. Add the chopped carrots and saute on medium-high for another 2-3 minutes.
  4. In a tea kettle, boil 1.5 L of water.
  5. Add the fresh ginger slices, kaffir lime leaves, lemongrass stalks and vegetable bouillon to the pot and pour in 1.5 L of hot water.
  6. Bring the soup to a boil and then allow it to simmer for 35-40 minutes or until the carrots are fork tender.
  7. Once the carrots are tender, discard all kaffir lime leaves and lemon grass stalks. I also discarded half of the ginger slices as I did not want it overpowering.
  8. Place the contents of the soup into a blender and blend on high until smooth (you may have to work in batches depending on the size of your blender).
  9. Place the blended soup back in the pot and heat on medium temperature. Add 1 cup of coconut milk and the juice of 1/2 a lime. Stir well until the coconut milk is well incorporated.
  10. Serve warm and garnish with chopped cilantro and chili.


NOTES:

  • Kaffir lime leaves and lemongrass freeze well and I always keep a stock in my freezer for various curries and soup.
  • For the vegetable bouillon, we always have a stock of Knorr bouillon in the pantry.


Kabocha Squash Tart w/Ricotta, Caramelized Onions & Sage

Processed with VSCO with s2 preset

Fall is the time when I miss home the most. Having grown up in New Jersey, having spent my college years in Boston and post-college days in New York City, I truly miss the fall season in the northeast and all that comes with it: Indian summer, intense foliage color changes, apple cider donuts and of course Thanksgiving. Not to say the fall in Switzerland is not beautiful, but the cold weather seems to arrive much earlier and there can be many days filled with fog and rain, just like today… So I decided to make this tart to bring a little sunshine to this gray Sunday using my favorite squash that until this year, I could not find anywhere in Switzerland. I was overjoyed to find Kabocha squash this past week at the Juckerfarm in Jona-Rapperswil, which is a beautiful place to also find numerous varieties of pumpkins, squash, apples and pears. I even found Nashi pears!

Processed with VSCO with s3 presetProcessed with VSCO with s2 presetProcessed with VSCO with s3 preset

As it is Kürbiszeit (“pumpkin time” in German), almost everyone I know in Switzerland is making pumpkin soup, but I wanted to make something else that was just as savory and full of pumpkin flavor. This tart recipe was inspired from conversations I have had in the past few days with colleagues and friends about their favorite pumpkin/squash recipes. It was super easy to make since I used pre-made puff pastry and works perfectly for a Sunday brunch and paired with a salad, it makes for a great weeknight dinner. Let the Kürbiszeit continue!

Processed with VSCO with s2 presetProcessed with VSCO with s2 presetProcessed with VSCO with s2 presetProcessed with VSCO with s2 presetProcessed with VSCO with s2 presetProcessed with VSCO with s3 presetProcessed with VSCO with s3 presetProcessed with VSCO with s2 preset

INGREDIENTS: (serves 4-6)

1 lb. Kabocha Squash (225 g or 1/4 of a medium sized Kabocha squash)

1 L water for steaming

4 medium yellow onions

2 tbsp extra virgin olive oil

1/2 tsp salt (1.5 ml)

1 cup ricotta (250 g)

Salt & pepper to taste

1 puff pastry sheet (270 g, octagon/circular shape if available)

butter to grease tart dish

5-6 fresh sage leaves

1 egg

INSTRUCTIONS:

  1. Preheat oven to 395F (200C).
  2. Wash the Kabocha squash, cut into quarters and scoop the seeds out. Use one quarter (or a part equivalent to 1 lb.) and place onto a steamer basket in a large pot with 1 L of water. Place the lid onto the pot and steam for approx. 20 minutes or until fork tender and then set aside to cool.
  3. While the squash is steaming, thinly slice 4 medium yellow onions.
  4. Heat 2 tbsp of extra virgin olive oil on high in a large frying pan and add in the sliced onions. Continue to cook the onions on medium-high heat and stir regularly. Season the onions with 1/2 tsp salt and cook the onions until a medium-brown (approx. 10-15 minutes). Set aside to cool.
  5. Season the ricotta with salt and pepper and mix well.
  6. Slice the cooked Kabocha squash into thin slices (the skin is tender so I kept it on).
  7. Grease the tart dish with butter and place the puff pastry into the dish and press firmly into the frame while folding in the edges.
  8. Place the sliced Kabocha squash onto the puff pastry and distribute evenly. Season the squash with salt, pepper and a generous drizzle of extra virgin olive oil.
  9. Add the seasoned ricotta cheese and distribute evenly onto the squash.
  10. Add the caramelized onions and distribute evenly.
  11. Garnish with a few sage leaves and brush the crust with egg wash.
  12. Bake for 30-35 minutes or until the crust is golden-brown.
  13. Remove from oven and allow the tart to cool for 5-10 minutes. It’s best to serve warm.


Pasta al Pomodoro

image2-91.JPG

Pasta al Pomodoro… In my opinion, this is one of the best comfort foods of ALL time. This dish is so simple, but utterly divine when made properly. And I use the word “properly” because I have to admit, I never knew how good this could taste before I met my husband and he made his version for me.

I know everyone has their own recipe for a pomodoro sauce and I’m sure every Italian mama has their own secrets and family recipe, but I have to be honest with you, my husband’s version is pretty damn good.

My husband always emphasizes 2 main points for this dish: (1) make sure you cook the onions slowly to ensure they are sweet once cooked through and (2) the “marriage” of the pasta and sauce is the most important finish to the dish.

I also love this dish because we always have the necessary ingredients on hand and it’s usually our “go-to” dinner when we have come back from a weekend away and there’s nothing else in the fridge, which is often!

Processed with VSCO with s2 presetProcessed with VSCO with s2 presetProcessed with VSCO with s3 presetimage1-120.JPGimage3-71.JPG

INGREDIENTS: (serves 4-5)

Extra-virgin olive oil

2 medium yellow onions, diced small 

3 cloves garlic, minced

2 anchovy filets (optional)

2-3 sprigs fresh rosemary

1/2 cup of dry white wine  (120ml, I usually use the Prosecco that I’m already drinking while cooking)

Pinch of sugar

Salt & pepper to taste

1 large can of whole or diced San Marzano tomatoes (28 oz. / 800g)

1 package (1 lb. / 500g) of Spaghetti, Linguini or any pasta of your choice

Salt for pasta

Grated Parmigiano-Reggiano

Fresh basil leaves or chopped Italian flat leaf parsley for garnish

DIRECTIONS:

  1. In a deep saute pan, heat a generous amount of extra-virgin olive oil (should coat the entire pan) on medium high and add the diced onions. Slowly cook the onions between medium and medium-high heat until they are transluscent. The key is to slowly cook the onions so they become sweet.
  2. Keep the heat on medium to medium-high and add in the garlic and the anchovy filets, which are optional. The anchovies will add umami to the sauce, but you won’t taste the actual anchovy taste at the end. The sauce will also taste great without them. Saute for about 1-2 minutes and stir frequently to prevent the garlic from burning and becoming bitter.
  3. Add the dry white wine and let it come to a boil for a minute or so.
  4. Add in the can of tomatoes and sprigs of rosemary. If you are using whole tomatoes, crush them with a spoon to break them apart.
  5. Add a pinch of sugar to the sauce, salt and pepper to taste and keep at a simmer to allow the sauce to reduce (20-25 minutes).
  6. Bring water to a boil in a large pot for the pasta. When the water comes to a boil, generously add salt (should taste like the sea) and add the pasta. Cook to al dente or even 1-2 minutes short of the cooking time on package.
  7. Remove rosemary sprigs from the sauce and when the olive oil starts to coat the perimeter of the pan, your sauce is ready and remove the pan from heat.
  8. Drain the pasta and reserve 1/4 cup of the pasta water.
  9. Add the reserved pasta water and pasta to the sauce. Mix well and make sure there is a “marriage” between the pasta and the sauce.
  10. Add a generous handful of grated Parmigiano to the pasta and a drizzle of good olive oil and mix.
  11. Serve and garnish with more freshly grated Parmigiano, freshly-cracked black pepper, a pinch of Fleur de Sel, and a fresh basil leaves or flat-leaf parsley.

Hugo Prosecco Cocktail (Elderflower-Mint-Lemon Prosecco Cocktail)

Summer has definitely arrived in Switzerland and there are two cocktails that I always look forward to enjoying in these warm months. These two cocktails are also ones I was only introduced to when I moved to Europe and they both happen to consist of Prosecco (my libation of choice all year round): the classic Aperol Spritz and the Hugo.

The Hugo is a refreshing cocktail, which consists of Prosecco, Elderflower Syrup, Mineral Water, Fresh Lemon and Fresh Mint. And it’s even better when you make your own Elderflower Syrup (Holunderblütensirup).

image1-115.JPG

Elderflower comes from the plant Samubucus and a delightful floral syrup can be made from its flowers, which bloom at the beginning of the summer. For those in Switzerland, these flowers are coming to their season end now, but you might be able to find them  blossoming at a higher altitude. If you can’t find Elderflower in bloom anymore, you can find the syrup in almost any Swiss grocery store and if you are in the U.S., you can typically find it in a specialty grocery shop or at Ikea.

Processed with VSCO with s2 preset

Here is my Hugo cocktail recipe along with my mother-in-law’s Elderflower-Lemon syrup recipe. Cheers!

HUGO COCKTAIL INGREDIENTS (1 serving):

small handful of ice cubes

1/8 cup Elderflower-Lemon Syrup (3 cl) – see below for recipe (or use store-bought Elderflower Syrup)

1 cup brut Prosecco (200 ml)

1/2 cup Sparkling Mineral Water (100 ml)

Fresh mint leaves (approx. 2-3 leaves)

Splash of fresh lemon juice

Slice of lemon for garnish

INSTRUCTIONS:

  1. Place ice cubes in a wine glass or any glass of your choice.
  2. Pour the Elderflower Syrup over the ice.
  3. Pour in the Prosecco followed by the Sparkling Mineral Water.
  4. Squeeze the juice of a lemon wedge and add in fresh mint leaves.
  5. Stir well to incorporate the ingredients.
  6. Garnish with a lemon slice.

NOTES:

  • The ratio of syrup to Prosecco to Mineral Water can of course be altered to your liking


ELDERFLOWER-LEMON SYRUP INGREDIENTS (approx. 3 L):

15 cups granulated white sugar (3 kg)

1.5 L water

15 heads of Elderflower

2 whole lemons

3.5 tbsp citric acid (50 g)

INSTRUCTIONS:

  1. Pour the sugar and water into a large pot and gently heat the mixture on high until all the sugar has dissolved and slightly under a boil. Continuously stir.
  2. While the mixture is heating, cut the heads of your Elderlower and brush any excess dirt off the blossoms.
  3. Pare the zest from your lemons using a vegetable peeler and then slice the lemons into thick round slices.
  4. Take the sugar water mixture off the heat and add in your Elderflower heads, lemon zest and slices and then the citric acid.
  5. Stir well and place a tight lid onto your pot and let it sit outside (does not have to be shaded) for up to 48 hours.
  6. After this time, filter the syrup through a coffee filter and repeat process if necessary to make sure the syrup is clear.
  7. Using a funnel, pour the syrup into sterilized bottles.
  8. Store the bottles away in a cool shaded area such as a cellar. They will keep for up to 4-6 months.

NOTES:

  • You can omit the citric acid if you will want to use the syrup right away. Just make sure to store it in the refrigerator.
  • Make sure the elderflower blossoms are yellow in color (almost powdery) which is indication of their mature blossom.


  • Processed with VSCO with s2 presetProcessed with VSCO with s2 presetProcessed with VSCO with s2 presetProcessed with VSCO with s2 presetProcessed with VSCO with s2 presetProcessed with VSCO with s2 presetProcessed with VSCO with s2 presetProcessed with VSCO with s3 presetProcessed with VSCO with s3 presetProcessed with VSCO with s2 presetProcessed with VSCO with s2 presetProcessed with VSCO with s2 presetProcessed with VSCO with s2 presetProcessed with VSCO with s2 presetProcessed with VSCO with s3 preset


Swiss Schlangenbrot (Grilled “Snakebread”)

image1-93.JPG

For the past 6 years, we have been spending a long bank holiday weekend in May in le Plateau des Mille Etangs (plateau of 1000 ponds) in the Southern Vosges in the region of Alsace, France. It has become one of the highlights of my year and has become an annual tradition of ours. 4-5 days are spent in a remote cabin in the middle of nature’s beauty with my family and the family of brother-in-law. It’s a paradise for children and adults and time is only spent on fishing, paddle boating, taking naps in hammocks, flower picking, reading, playing card games and of course cooking. This is a place where apéro starts as early as you want it to with a glass of Crémant or Cidre and almost every meal is cooked on the grill. This trip really marks the start of the warm weather and witnessing spring in bloom in this beautiful natural paradise is a privilege.

IMG_8429.JPGDSC_0175_2.JPGIMG_9548.JPGIMG_9533.JPG

Last year was the first time I was introduced to Schlangenbrot, which is a dough that is rolled out on a stick like a snake and is baked over an open fire. It is a very common dish to enjoy while camping because the dough is super easy to make and of course, you need an open fire to bake it. It’s as ubiquitous to the Swiss as s’mores are to Americans. This year, with the help of my lovely sister-in-law, we wrote out the recipe and added in fresh rosemary. Let the grill season begin!

image3-54.JPGProcessed with VSCO with s2 presetimage2-69.JPGProcessed with VSCO with s2 presetimage1-100.JPGProcessed with VSCO with s2 presetProcessed with VSCO with s2 presetimage1-103.JPGimage2-73.JPGimage4-5.JPGimage2-75.JPGimage3-59.JPGimage1-104.JPGimage3-60.JPGimage2-76.JPGimage2-77.JPGimage1-105.JPGimage3-61.JPGimage1-106.JPGimage2-78.JPGProcessed with VSCO with s2 preset


INGREDIENTS (approx. 6 bread sticks):

4 cups all-purpose flour (525 g)

1 1/2 cups warm water (300 g)

2.5 tsp dry yeast (7 g)

1 tsp salt (1 TL)

1 tbsp extra virgin olive oil (1 EL)

6 sticks for baking


INSTRUCTIONS:

  1. Place 4 cups of flour in a large mixing bowl.
  2. Make a well in the center of the flour and add in 2.5 tsp of the dry yeast in the center and add in 1/2 of warm water. Mix the yeast and warm water to make a sludge and let it sit for about 10 minutes.
  3. Sprinkle 1 tsp salt in the perimeter of the flour.
  4. After about 10 minutes, add in another 1/2 cup of warm water to your dough mixture and start to mix with your hands. Add in the last 1/2 cup of warm water and 1 tbsp of extra virgin olive oil. Mix the dough with your hands until the flour is well incorporated.
  5. Take the dough out of the mixing bowl and knead on a flat surface for approximately 15-20 minutes until air bubbles start to form in your dough and the dough is smooth.
  6. Form a ball with the dough and place it back in the mixing bowl. Cover the bowl with plastic wrap and a kitchen towel on top and place in a warm spot for at least 1 hour to rest. I let mine rest for 90-12o minutes.
  7. Once the dough has rested, finely chop fresh rosemary and fold it into the dough.
  8. Break the dough into 6 equal pieces and roll them out into “snakes” with your hands.
  9. Wrap each “snake” onto a stick and grill them over an open fire. If you have a grill over the fire, you can place them directly down on the grill or you can roast them over the fire like marshmallows.
  10. Make sure you turn the sticks continually to bake the dough slowly and to achieve a nice brown crust around the bread. Cooking times will vary due to the temperature of the fire, but make sure the dough is completely cooked through.
  11. Serve with extra virgin olive seasoned with sea salt and herbs and enjoy!

Asparagus Ricotta Prosciutto Wild Garlic Pesto Baked Pastry Roll

image1-88.JPG

One of the joys about cooking seasonally is that there are certain dishes that you look forward to because you can only truly enjoy them a few times a year and at a specific time of year. This is one those dishes. I know as soon as spring rolls around and asparagus is in the markets at it’s prime seasonal time, my husband will make this delicious puff pastry filled with Asparagus, Ricotta and Landrauchschinken (Swiss version of Prosciutto). Luckily, I still had some wild garlic pesto on reserve and it pairs perfectly with this “spring roll”.

This dish is incredibly easy to make (since I don’t make my own puff pastry) and it’s fantastic to serve at a brunch or for dinner with a beautiful salad on the side. My husband also often makes one roll with the cured ham and then one with smoked salmon, which is equally as delicious. There are so many variations to this dish you can make, but the asaparagus is what really makes it.

Processed with VSCO with s3 presetProcessed with VSCO with s3 presetProcessed with VSCO with s3 presetProcessed with VSCO with s3 presetProcessed with VSCO with s3 presetProcessed with VSCO with s3 presetimage1-89Processed with VSCO with s2 presetimage3-51.JPGimage1-90.JPGimage3-52.JPGimage2-65.JPGimage1-91.JPGimage2-66.JPGimage1-92.JPGimage2-67.JPGProcessed with VSCO with s2 preset

INGREDIENTS (4-6 servings)

11 ounce puff pastry sheet in a rectangular shape (320 g Blätterteig in German)

2 bundles of thin asparagus (1.75 pounds or 800g)

1 cup whole-milk ricotta (250g)

8-10 slices of prosciutto (or Landrauchschinken, Swiss smoked cured ham)

1/4 cup of wild garlic pesto (optional)

1 egg yolk beated

1 tbsp vegetable stock (10 g; I prefer the Knorr brand)

2 cups water to cook asparagus (470 ml)

salt & pepper to taste

INSTRUCTIONS

  1. Preheat your oven the temperature indicated in the instructions of your puff pastry. I had my oven preheated to 390 F (200 C).
  2. Prepare your asparagus by breaking the bottom stems off or trimming them.
  3. In a large stock pot, add in 2 cups of water and bring to a boil. Add in the 1 tbsp vegetable stock to the boiling water and then add in the asparagus stems. Cover and cook for approx. 4 minutes or until tender.
  4. Season the ricotta with salt and freshly cracked pepper and mix well. Set aside.
  5. Drain the asaparagus stems and rinse with cold water to stop them from cooking longer.
  6. Take your puff pastry out of the refrigerator and roll it out on a baking pan lined with baking paper.
  7. Cut 3 strips length-wise and approx. 1/2 inch wide. Set these strips aside, which will be used for decoration (optional).
  8. Line the puff-pastry with the prosciutto slices, leaving room (about 1 inch) at the bottom of the pastry  and about 1 inch on the right and left sides.
  9. Place the asparagus stems evenly on top of the prosciutto slices (parallel to the longer side of the puff pastry).
  10. Top the asparagus with the ricotta and then add a layer of the wild garlic pesto if you would like.
  11. Fold the top half of the puff pastry over the filling and brush the egg wash on the bottom part of the puff pastry.
  12. Bring the bottom part of the puff pastry over the top half as to close the roll.
  13. With a fork, gently press the ends together to close the top part of the roll.
  14. Fold the ends in and gently press with a fork to close both ends.
  15. Brush the entire top of the pastry roll with the egg wash.
  16. Decorate the top of the pastry roll with the 3 pastry strips.
  17. Take a fork and poke the top of the pastry roll a few times on top to allow the steam to exit.
  18. Place in the oven for approx. 30-35 minutes or until beautifully brown and crispy.
  19. Allow the roll to rest for a few minutes before slicing and serving.


Korean Pancake with Wild Garlic, Scallions & Zucchini (Pajeon)

image1-84.JPG

One of the first signs of spring for me here in Switzerland is wild garlic (Bärlauch in German). As soon as the snow starts to melt and we have a few warmer days at the end of the winter, you can start to spot wild garlic. And as soon as it really feels like spring, you see these leaves pop up everywhere and in abundance!

image1-73.JPG

Wild garlic or Allium ursinum can often be found in shady and moist areas. And if you see them growing somewhere once, they will most likely be growing there year after year. The best time to eat this wild garlic is in the first half of spring before they start to flower. And when picking your own wild garlic, go for the younger and smaller leaves as they are more delicate in taste. As you pick these leaves, you can instantly smell garlic and that garlic taste is stronger when eaten raw.

image1-82.JPG

For some reason, today was the first time I ever thought of using wild garlic in Korean food. I have no idea why it took me so long considering Koreans use garlic in almost every dish! So I thought to myself, why not pick some wild garlic today since the season is coming to end soon and add it to Korean Scallion Pancakes (Pajeon)? I added lots of wild garlic, green onions and zucchini to make this very green and very delicious pancake (Jeon in Korean) on this beautiful spring day.

Processed with VSCOcam with s2 presetimage1-81.JPGimage1-79.JPGimage2-60.JPGimage2-59.JPGimage3-47.JPGimage1-78.JPGProcessed with VSCOcam with s3 preset

INGREDIENTS (makes 1 large pancake)

1/2 cup white flour (70 g)

1/2 cup rice flour (60 g)

1 cup cold water (235 ml)

3/4 tsp salt (4-5 g)

pinch of sugar

1/2 tsp fermented Korean soybean paste (optional or can substitute miso)

1 cup julienned zucchini (90 g)

1 cup roughly chopped wild garlic (20 g)

1 cup roughly chopped green onions length-wise (40g)

vegetable oil to fry pancake

For the Soy Dipping Sauce

2 1/2 tbsp soy sauce

2 tbsp rice vinegar

1 tbsp mirin

few drops of sesame oil

freshly cracked pepper

green onion slices for garnish

INSTRUCTIONS

  1. In a large bowl, mix the white flour, rice flour and cold water and mix well. Whisk in the salt, pinch of sugar and soybean paste until well mixed. Let the batter sit for 5 minutes or so.
  2. Add in the zucchini, wild garlic and green onions and mix to make sure the vegetables are evenly distributed.
  3. Heat a large frying pan on high and add in approx. 2 tbsp of vegetable oil. When the pan is piping hot, pour all of the pancake mixture and spread evenly on the pan.
  4. When the edges start to brown, flip your pancake over and fry the other side until golden brown. Add a bit more vegetable oil if necessary.
  5. Once both sides are crispy golden brown, slice and serve hot with soy dipping sauce.
  6. For the dipping sauce, mix soy sauce, rice vinegar, mirin, sesame oil, pepper and green onion slices in a small bowl.


NOTES

  • For an extra crispy pancake, make this ahead of time and when ready to serve, heat and fry the pancake on both sides again.